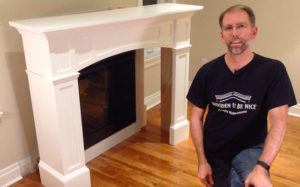
There are 6 steps to installing a fireplace mantel. For a demonstration, watch our video on How to Install a Fireplace Mantel.
Step 1: Fireplace Mantel Assembly
 To install a fireplace mantel, first you will need to assemble it to understand the full dimensions of the unit. Don’t rely on measurements from instructions or your building notes as they could be slightly off. The fireplace mantel in the video was built in our workshop so it doesn’t show you how a mantel kit goes together.
PLANS – woodworking plans are available for this fireplace mantel https://woodenitbenice.ca/collections/woodworking-plans
Step 2: Test Fit the Mantel
Once assembled, place the mantel in the position where you would like to install it. Mark the outside edge of the sides and top (you can mark on masking tape if you don’t want to put lines on the wall). If there is baseboard on the wall, it will need to be cut away. An oscillating tool is the best tool for the job, but if you want a cheaper tool to do the job, you can purchase a flush cutting hand saw and use a lot of elbow grease along with a chisel. When I built our mantel, I built it with extra long sides so I could cut the excess material off the back to ensure a tight fit at the front where the mantel touches the quartz surround.
Step 3: Scribe the Mantel Sides
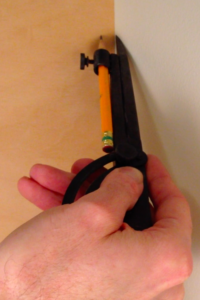
Scribing is a technique used to draw a line that follows the shape of the wall. What you’re looking to do is match the shape of the mantel side to the wall to create a tight seam between the mantel and the wall. To do this, you first need to level the fireplace mantel side to side and front to back. If you don’t get this step right, the scribing won’t work properly. In most cases, there shouldn’t be a large gap at the floor, but if there is, you will need to scribe the bottom first, and then do the sides second.
Now look for the gap between the fireplace mantel and the front of the fireplace surround. Using a compass with a sharp pencil, set the distance from the point to the pencil the same width as the gap. Scribe the mantel side to the wall by running the point against the wall and the pencil on the mantel side, drawing a line. This is the line you will trim the mantel side to.
Step 4: Cut Off Excess Material
With a scribe line on the fireplace mantel, move the mantel to a place where you can generate a lot of dust without making a mess in you home. There are several ways to trim the mantel to the scribe line:
- Use a jigsaw
- Use a belt sander if there isn’t a lot of material to remove
- If the mantel side is solid wood, you can use a hand plane
I cut the excess off using a jigsaw. You want to make sure you get close to the line when cutting, but not quite touching it. Once the wood is cut with the jigsaw, you can clean up the the cut with a belt sander and getting it right to the line. Whichever way you choose to trim the mantel, put a back cut on the edge, meaning make it slightly angled so the first point that will touch the wall is the outside edge that is visible. This helps to ensure the joint will be as tight as possible to the wall. Test the fit and adjust as needed It can take several tries to get it right.
Step 5: Installing Blocking
The next step is to install nailing blocks inside of where the fireplace mantel will sit. To do this, I measure the thickness of the material (top/sides) and mark an installation line using the marks on the wall from the outside edges to the fireplace mantel. In my case, the sides and top were 3/4” thick, so I measured 3/4″ to the inside of the lines on the wall from step 1.
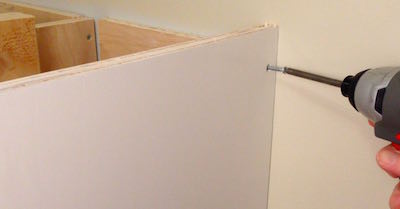
This will now give me the mark of the inside of the mantel. I install nailing blocks by securing them to the all studs to make sure it is stable and strong.
Step 6: Attach Fireplace Mantel
Once the blocking is secured, the fireplace mantel can be put back in place and you can then attach the side and top of the mantel to the blocking. When I installed our mantel, the top was going to be hidden by crown moulding so I was able to use screws to attach the mantel to the backing to give it extra hold. When I installed the top piece on the mantel base, I secured a small piece of wood to the wall in the middle because I was using 3/4″ cabinet plywood. If the top was made from MDF, I would have put blocking along the whole back as MDF tends to sag over time without full support.
To secure the top I did not want any nail holes to fill, so I relied on wood glue and a nice tight fit to make sure this piece would stay together.
We hope you find this article and video helpful. We would love to hear your feedback by adding a comment on the video. We’re happy to answer questions there as well.
To learn about what makes a quality fireplace mantel, see our Quality Fireplace Mantel page.