This railing installation uses a handrail with a groove in the bottom for spindles and fillet strips. The bottom of the spindles sit in a groove in the shoerail to securely hold them in place. All the parts were pre-finished so they didn't have to be painted, stained, and finished once in place. Watch the installation process in this video.
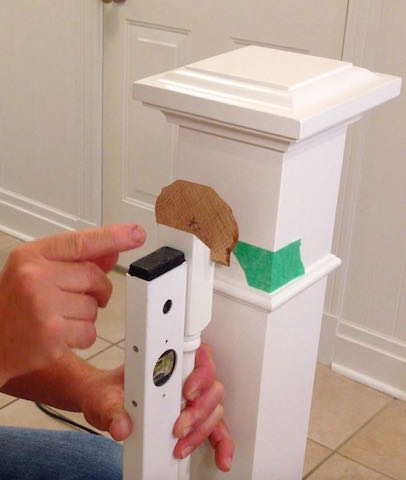
To begin installing a handrail you will want some parts to determine the layout. Start by cutting a small piece of the handrail on the angle you will use (our stairs were on a 41 1/2 degree angle). Place the piece of handrail on the spindle (also called balusters) and determine the spindle length.
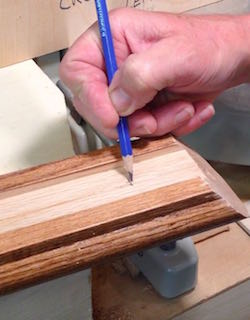
Trim the spindle to length. With these two parts, you now have a template to mark the position of where the handrail will attach to the newel post. Mark the handrail position on the newel post at the bottom and top of the railing run. Measure the length of the handrail at the same point on each newel post. At this point we don’t cut the handrail to length as there are some special steps to follow for the hardware assembly.
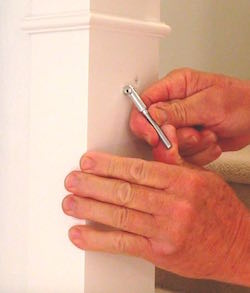 Install the Handrail Bolt
To conceal the fasteners on the handrail, we used a ZipBolt to attach the top portion of the handrail. This is a unique fastening system that screws into the newel post on one end and uses a bolt and special nut on the other end to tighten the bolt from underneath the handrail. We followed the instructions to locate the position on the newel post and drilled a pilot hole. After screwing in the ZipBolt, we moved on to laying out the holes in the handrail.
 Drill Bolt Hole in End of Handrail
Again, we followed the hardware instructions to mark out the measurements. We then took a 1/4’ drill bit and drilled a pilot hole on the center mark on the end of the railing. We drilled the hole as deep as we could as it had to extend past the hole for the nut. We switched over to a larger bit to finish the hole at 3/8”.
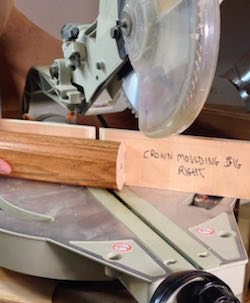
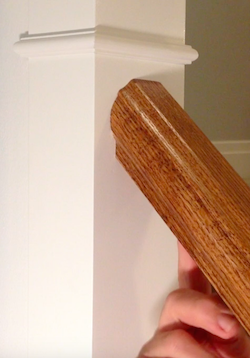
Miter the End of the Handrail
We then set up the miter saw to a 41 1/2” degree angle to match the actual slope of the stairs. After trimming off the square end of the handrail, we could mark out our measurements.
 Measure Length of Bolt Hole
The handrail bolt extends into the handrail and needs to be secured with the nut assembly that is recessed into the handrail. We measure out the location for a hole that will be drilled out with a forstner bit to create a flat-bottom hole for the nut assembly.
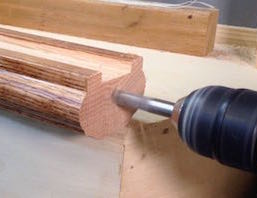
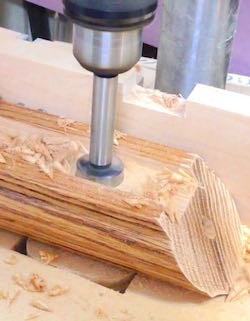 Drill Hole for Nut Assembly Hardware
Using a drill press, we cut a flat-bottom hole in the handrail for the nut assembly. This is a large hole, so the drill press is set to a slow speed to avoid creating too much heat when cutting into the handrail.
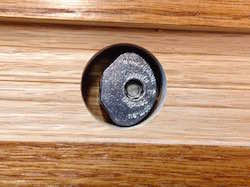 Nut Assembly in Handrail
This is what the nut assembly looks like in the handrail. The bolt is inserted from the right side of this photo so the bolt goes through the nut. The nut is tightened with an allen key.
 Installing the Handrail
We test fit the handrail to the newel post as best we could to ensure the holes lined up properly. The bolt needs to slide inside the end of the rail and the nut assembly needs to catch the bolt from within the cavity drilled out with the forstner bit. After confirming the fit, we cut the handrail to length on the bottom end.
We attach the handrail using the ZipBolt on the top end. It’s amazing to watch as the allen key tightens the nut, the railing lifts itself into place on the bottom end. It’s a very strong connection. The final step is to attach the bottom end of the handrail using a a pilot hole and a round head screw through the underside of the handrail. It’s important not to use a countersunk flat head screw as this could split the handrail when tightened.
Now that the railing has been installed we’re ready for the spindle/baluster installation.