Spray finishing has been a dream of mine for years. As a woodworker, I’m always looking for the best quality finish and the most efficient way to get the job done. Our staircase renovation project gave me a good reason to invest in spray finishing equipment as I had to paint 40 spindles/balusters on the staircase. This is my story about using HVLP spray equipment for the first few times.
What is HVLP?
HVLP stands for high volume, low pressure. This means the air that carries the paint out of the spray gun is using low pressure. Compared to a conventional spray gun, this uses less finish, produces less overspray, and has less bounce back of finish on the piece being painted. It will save you money in using less finish and there’s less cleanup work.
Types of Spray Gun Equipment
The first thing I had to learn was what equipment I needed. I spent a weekend with a professional finisher, learning how to spray paint a fireplace mantel I made. This gave me the feel for how to paint with an HVLP conversion spray gun and compressed air. I ended up buying an HVLP spray gun with a turbine unit. Let me explain the difference.
An HVLP conversion gun uses air from an air compressor. As it needs a constant flow of air, the air compressor needs to be fairly large to support the spray gun. If you have the space and don’t need the sprayer to be portable, this might be an option
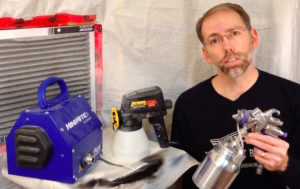
A turbine HVLP uses a portable turbine to generate the air for the spray gun (see blue box in this photo). The turbine provides a continuous flow of air, similar to how a vacuum exhausts air. The advantage of using a turbine is that it’s portable and compact. The turbines are rated by how many fans are used, referred to as “stages”. I purchased a 3-stage turbine, meaning it uses 3 fans. You can buy them in 4 or 5 stages as well.
An airless spray gun is another type of spray finishing tool you may have heard of, but is not designed for fine finishes. It’s better for painting large areas such as exterior walls where a high volume of paint is needed.
Mixing Paint for a Spray Gun
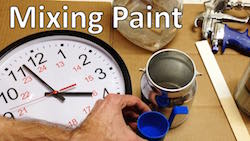 One of the most important parts of spray painting is the paint. It needs to be a paint that settles well, meaning it will level out to form a flat surface. It also needs to be the right consistency so it doesn’t leave a splatter like pattern on the piece. The key word here is viscosity. The paint needs to be the right thickness to be used in the HVLP sprayer. I use only water-based finishes, so I thin the paint with water. When I mix the paint, I measure it with a viscosity cup to ensure it’s perfect for my spray equipment. Learning how to do this properly takes some practice, and you can see how it’s done in this How to Mix Paint for a Spray Gun video.
First HVLP Paint Spraying Experience
After learning the basics with a professional, I had the foundational knowledge of how to spray on a finish. I bought a Fuji Spray Mini-Mite 3 HVLP turbine with a siphon cup spray gun. The first thing I sprayed was the primer on 40 stair spindles. Mixing the primer to the right viscosity took a long time to get right, but now I can do it in about 5-10 minutes.
I sprayed the first round of primer, one at a time, rolling each spindle to coat all sides. Then I would move the spindle to the drying area and grab another. I quickly learned, this was not an efficient way to do this. After doing some research, I found a solution by screwing a 2×4 to the end of each spindle so I could have them stand up. That way I could paint all sides of the spindles without having to move them – much faster!
After a few coats of primer, it was time to sand. My wife did most of the sanding on this project and it took a lot of elbow grease to get it done. I vacuumed them down and was ready for the paint. I used Benjamin Moore Advance paint as my finisher told me it’s the best water-based finish for spray painting. It works well because when you sand it, it creates a powder instead of rolling off in rubbery pieces. This is important when you need to sand out runs, and you will.
At this point, I’m starting to get used to the HVLP spray equipment. I’ve narrowed the spray pattern to reduce wasted paint and dialled back the air pressure to get less bounce back, and I have a better understanding of how to adjust the fluid control to get the best results. I found with each coat of paint, I learned a little more about how to aim the spray gun and how thick I could spray the paint without risking it running. After a few coats of paint, it was back to sanding before putting on the final coats of paint on the spindles.
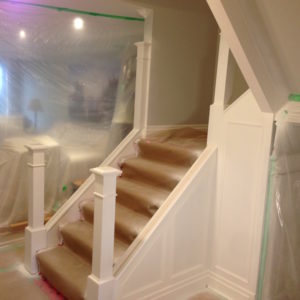 In this stair renovation project, I also used my HVLP spray gun to paint the staircase. This was the first time I used it inside a finished space, so I took time to mask off all the walls and floors. My confidence with the HVLP sprayer was building, but I was still nervous about painting wainscoting, newel posts, and stair components. My biggest fear was getting paint runs that would take a long time to sand out.
I knew I had to start at the top and work my way down to avoid getting dried paint particles from overspray on my fresh paint. When the first coat was dried, I was surprised that the texture on the lower portion of the staircase was rough. What happened was the overspray from the upper floor coasted the lower parts before I painted them. After sanding out the parts affected, I then covered the lower sections to avoid this when I painted the next coat.
I did end up with a few runs in the paint, but nothing major. The runs were in the corners so I learned to paint on either side of a corner instead of shooting the paint directly into the corner. This way the paint didn’t build up in a concentrated spot.
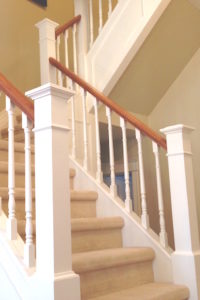
I painted 4 coats. On each coat of paint, I inspected how the finish went on and adjusted how I was spraying. By the final coat, my spray paint technique was refined and I’m very happy with the finish using the HVLP spray gun.
Since this project, I’ve done some spray finishing in my workshop using a collapsable spray booth. My confidence and speed is building. The cleanup work of the spray gun is faster. My spray technique is expanding as I gain more understanding of what to do to get the result I am looking for. Learning how to spray a finish takes time and experience, but in my opinion, it’s well worth the investment.
It took me years to finally take the plunge into HVLP spray finishing because I found the idea intimidating and expensive. I now know the value of the finishing process I’m using and I don’t regret the decision. I hope you find this information helpful. If you have questions, feel free to leave a comment on one of our videos and we’re happy to respond.